A bicycle’s derailleur acts like the conductor in an orchestra, ensuring your ride shifts smoothly across gears. Imagine pedaling up a steep incline and suddenly finding your chain stuck or the gears slipping. Such disruptions can be purely frustrating and, at times, dangerous. Proper derailleur alignment keeps everything running like a dream.
Misaligned derailleurs can lead to rough shifting, chain drops, and that annoying grinding sound that makes every ride less enjoyable. If your bike’s not shifting gears smoothly or if you’ve experienced chain slips, it might be time to check and adjust the derailleur. Don’t worry—I’ll break it down for you.
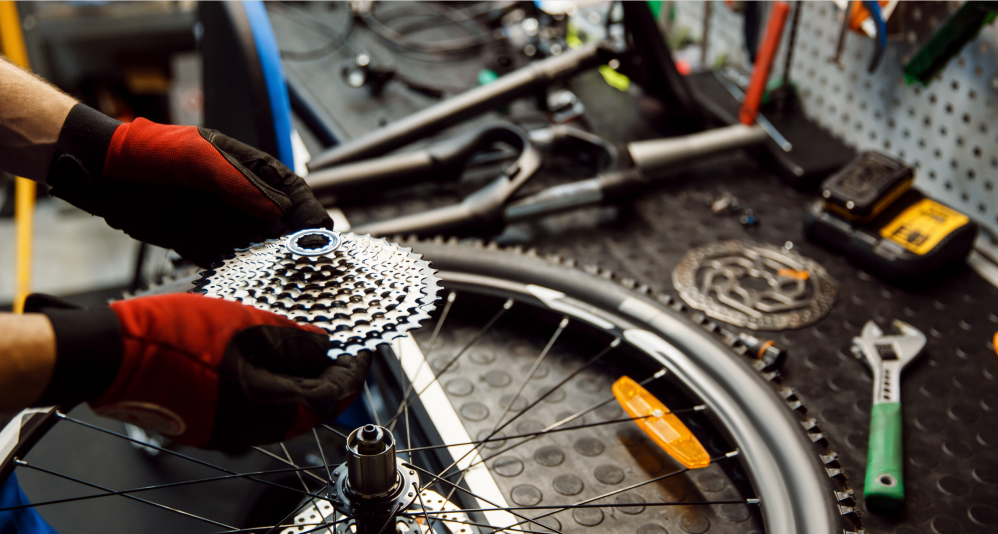
You’ll need a few basic tools like a Phillips screwdriver and possibly an Allen wrench set to get started. These are everyday items for anyone who enjoys DIY bicycle maintenance. You may also want a bike stand to free your hands while making tweaks, but it’s not absolutely necessary if you can prop the bike up securely.
Routine derailleur adjustments can do wonders for both performance and safety. Keeping up with these adjustments ensures you’re always enjoying a stable and responsive cycling experience. No one wants a surprise mishap because of neglected maintenance. A well-adjusted derailleur equals fewer headaches and more joyful rides.
Preparing for Adjustment: Safety and Setup
Tackling derailleur adjustments requires a safe and stable environment. Make sure your bike is secure, preferably on a bike stand or safely propped up. If it wobbles or shifts, it could complicate your repairs or create safety hazards.
Getting your tools together and organized can save loads of time. You’ll need that trusty Phillips screwdriver—probably a few sizes, just in case—and Allen wrenches. A cleaning rag and some bike lubricant are handy, too. Having everything within arm’s reach makes for a smoother process.
Before jumping into adjustments, it’s essential to recognize when they’re needed. Signs like noisy shifts or chain drops are good indicators. Spin your bike pedals while it’s stationary to listen for any unusual sounds or resistance, identifying where the derailleur might be misaligned.
Knowing your bike’s design and the manufacturer’s specs can help guide your adjustments. Every derailleur type isn’t the same, and specifics can vary, so checking any manuals or online resources for your specific model can save you a lot of hassle.
Preparation is key for effective adjustment. A little patience and attention to detail at this stage pave the way for a successful tune-up, ensuring optimal bike performance and a smooth ride.
Front Derailleur Adjustment
Adjusting the front derailleur involves getting the height and alignment just right. Start by checking the gap between the derailleur cage and the chainring teeth. Aim for a small gap, about 1-3 mm. This ensures the cage sits at the correct height, reducing the risk of chain rub or drop.
Once height is sorted, align the derailleur so it’s parallel with the chainrings. A misaligned cage can lead to poor shifting and more wear on the drivetrain parts. A quick eyeball from above might be all you need to see if it’s out of line.
Next up are the limit screws, usually marked ‘L’ and ‘H’ on the derailleur. The ‘L’ screw stops the cage from moving too close to the frame, preventing the chain from falling inside. The ‘H’ screw does the opposite, preventing the chain from running off the outside. Adjust these screws to stop the chain from overshooting the gears.
Cable tension comes into play for smooth gear changes. With the chain on the small chainring and smallest or largest rear cog, adjust the cable tension using the barrel adjusters. Too tight, and shifting becomes stiff; too loose, and it won’t shift at all.
Sometimes, common issues like chain rub or slow shifting might crop up. A little nudge on the limit screws or tweaking cable tension usually fixes these little nuisances. If things still feel off, retrace your steps and double-check the alignment and height.
Rear Derailleur Adjustment Techniques
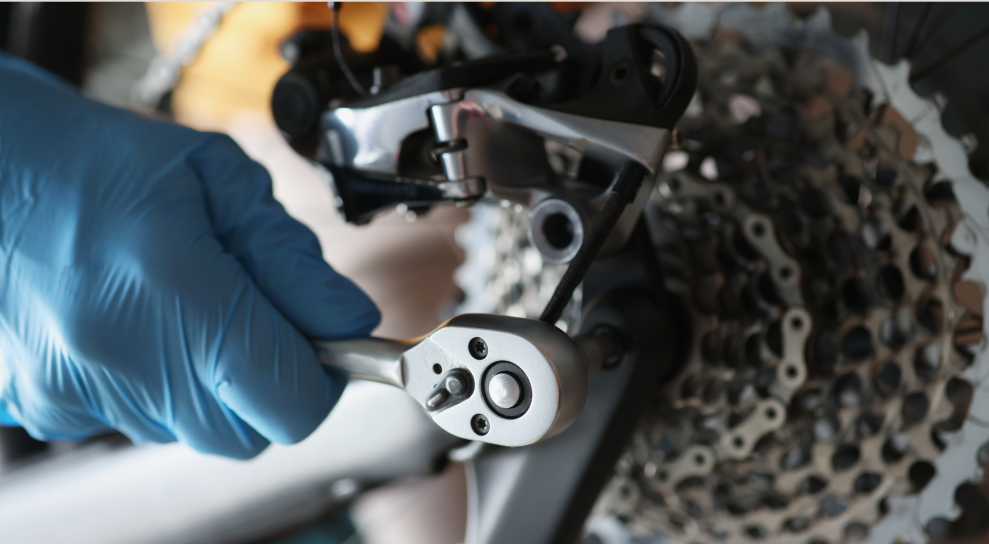
The rear derailleur is what keeps your bike’s shifting game on point, especially when you tackle those steep climbs or sudden shifts. First, you’ll want to ensure that the derailleur hanger—the piece that connects your derailleur to the bike frame—is straight. A bent hanger throws everything out of whack and is often the sneaky culprit behind erratic shifting.
Setting the limit screws is crucial for preventing the chain from going where it shouldn’t. You’ll find screws labeled ‘H’ for high and ‘L’ for low on the derailleur. The ‘H’ screw keeps the chain from overshooting towards the wheel, and the ‘L’ screw prevents it from falling off the cassette on the other side. Get these wrong, and you might end up with the chain off the gears entirely.
When it comes to refining cable tension, the barrel adjuster is your best friend. It’s usually located where the cable meets the derailleur. If your shifting feels sluggish, turning the adjuster one way will tighten the tension, while the other direction will loosen it. It might take a couple of tries to hit that sweet spot, but patience here pays off in less annoying squeaks and smoother gear changes.
Sometimes, you’ll encounter common issues like skipping gears or slow shifts. These often mean the cable is either too tight or too slack. Adjusting the barrel a touch usually irons out these kinks. If problems persist, a deeper dive into the derailleur setup might be needed to spot less obvious misalignments.
Test Ride and Fine-Tuning for Perfection
A test ride is where you really see how all these adjustments come together. Begin by riding on a flat surface where you can safely shift through all your gears. Listen closely for any noises that might hint at maladjustments. Smooth shifts and silence are what you’re aiming for.
If you hear grinding or feel resistance, it might mean the derailleur still needs tweaking. During the ride, pay attention to how the bike shifts under different loads and speeds. This provides a clearer picture of any persistent issues.
When making additional adjustments, take it one tweak at a time. Fine-tuning cable tension or slightly adjusting the limit screws might solve the problem. Incremental changes let you pinpoint the exact issue rather than making wild guesses.
Keep an ear out for derailleur noise during shifts. Noises indicate spots where the setup might be off just a little. Often, it’s a simple fix with a quick adjustment here or there.
If things still aren’t running smoothly after your efforts, don’t hesitate to seek professional advice. A mechanic might spot issues that aren’t obvious at first glance, helping maintain your bike and confidence in riding it.
Professional Maintenance and Long-Term Care
Sometimes it takes a seasoned eye to keep your bicycle in top shape. Recognize when it’s time to hand the reins over to a professional mechanic, especially if your previous adjustments aren’t quite hitting the mark or if you’re still hearing strange noises.
Regular maintenance checks can save you a ton of trouble down the road. Make it a habit to clean your drivetrain and check the derailleur alignment and cable tension every few rides. This keeps everything in tip-top shape and prevents larger issues from cropping up.
Keep an eye out for worn components, like stretched cables or bent hangers, and replace them promptly. Change usually means that a part is ready for an upgrade, keeping your bike’s performance and safety at its peak.
Consistent care ensures that your bike performs well over the long haul. Properly maintained bikes give you both a safer and more enjoyable ride experience, letting you focus more on the journey and less on potential issues.