Getting out on the mountain bike trails is one of my favorite ways to enjoy the outdoors. Over the years, I’ve learned how frustrating it can be to have a ride cut short by a mechanical problem that could’ve been handled with the right gear. Packing an emergency repair kit isn’t just convenient—it really keeps the ride going and boosts my confidence, especially when I’m far from help. In this guide, I’ll walk you through all the gear I pack in my emergency repair kit for mountain bikers, why each item is important, and plenty of tips from my experience.
Why a Mountain Bike Emergency Repair Kit Really Matters
Mountain biking takes me to places where help isn’t close. Trails can be rough, the weather can change suddenly, and bike problems seem to happen just when you’d least want them. Over time, I’ve realized that being able to make quick fixes on the trail can be the difference between riding back to the car or being stuck for hours. More folks are heading off the beaten path these days, making a repair kit one of those must-have basics that keeps me ready for anything.
Bike shops and longtime riders will usually recommend packing a solid set of tools and spares whenever you ride. The demand for portable multitools and bike repair gear has shot up in the past few years, showing that lots of us value staying self-sufficient on rides. I always give my kit a once-over before leaving home, and the habit has helped me avoid plenty of headaches.
Must-Have Items for an Emergency Mountain Bike Repair Kit
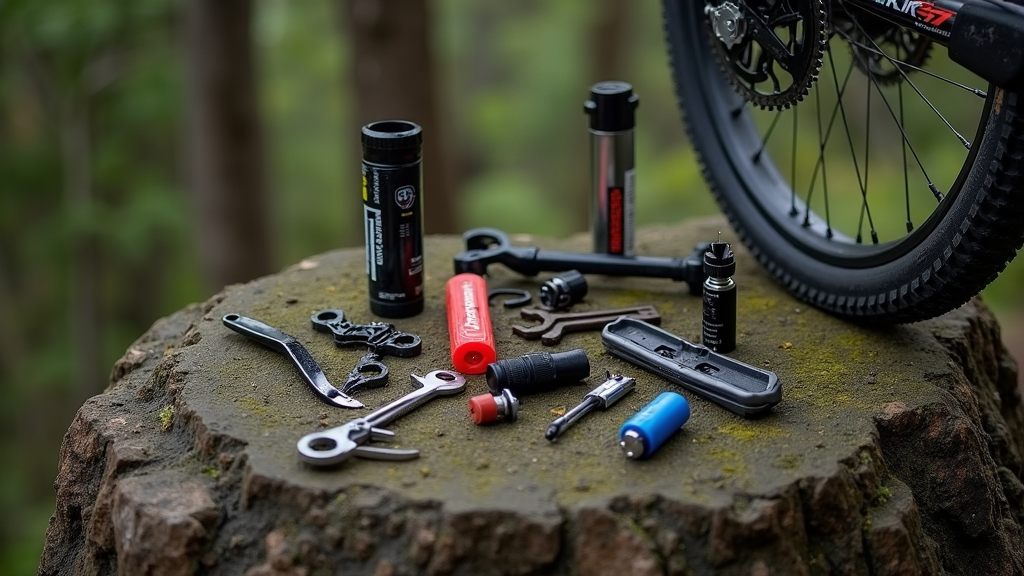
After lots of trial and error, here’s my go-to setup for every ride. Every item on this list has helped me more than once, and all have earned their spot through real-life use.
- Multitool: My multitool goes wherever my bike does. It packs Allen keys, screwdrivers, and a chain breaker all in one. Make sure the tools match your bike’s bolts—most need 4mm, 5mm, and 6mm hex keys.
- Tire Levers: Flats happen, so I always bring two strong plastic tire levers. These help me pop off stiff tires without damaging the tube.
- Spare Tube: Even with tubeless setups, a spare tube is a must. For big punctures or rim problems that sealant can’t handle, swapping in a tube is fastest.
- Puncture Repair Kit: Pre-glued patches or a tubeless repair kit take up hardly any space and have saved my ride more than once.
- Portable Bike Pump or CO2 Inflator: I like a mini pump because it’s always useable, but CO2 cartridges are speedy. If I use CO2, I still carry a pump for backup.
- Chain Quick Link: Broken chains miles from the trailhead aren’t fun. A spare quick link that fits your chain size makes repairs super easy.
- Zip Ties: I’ve used zip ties to hold a bottle cage in place, manage cables, and even patch up shoes. They’re light and handle lots of problems.
- Spare Derailleur Hanger: This simple part has saved my rides. If your hanger bends or snaps, having a matching spare gets you shifting smoothly again.
- Duct Tape: A strip of duct tape wrapped around my pump or tube fixes torn clothing, shoes, and even patches a tire in a pinch.
- Gloves and Wipes: Messy fixes—like dealing with a greasy chain mid-ride—are much easier if I’ve got mechanic’s gloves and some wipes packed.
Packing Your Repair Kit the Smart Way
I’ve tested a few ways to pack my kit, and it all depends on how and where I’m riding. Short rides mean I go light and use a saddlebag or small frame bag. When I’m out longer or far from home, I switch to a hip pack or light backpack to fit extra water and snacks. My best tip is always keeping gear in the same pocket so I can grab it quickly without dumping everything out mid-trail.
Sealing quick links, patches, and other tiny items in a little zip-top bag keeps them dry and easy to find. On rainy days, a waterproof bag helps, but even tucking things in inner pockets can do the trick. Keeping organized means faster fixes and less chance of losing a bolt in the dirt if the wind picks up or daylight fades.
Trail Repair Steps (Tips I’ve Learned)
Odds are you’ll deal with a flat or broken chain at some point. Here’s how I manage the most common emergencies, using what’s worked best for me:
- Flat Tire Fix: If I hear sudden air loss, I pull over and check for sharp debris or thorns. Using my tire levers, I unseat the tire just enough to remove the tube or peer in for damage. I swap in a new tube or patch it, check for anything still poking inside, then re-inflate and hit the trail.
- Broken Chain: My multitool’s chain breaker lets me carefully remove the busted link. Connecting the ends with a quick link and giving the cranks a spin helps be sure the fix is solid before continuing.
- Loose Components: Trails rattle stuff loose, so I use my hex key to tighten the seat post, handlebars, and even water bottle cage mid-ride. A quick check at the start of a ride can often prevent problems.
- Derailleur Hanger Swap: A bent hanger wrecks shifting, so I carry a spare and matching bolts. Swapping it takes a few minutes but saves the day if the original gets mangled in a crash.
Staying cool and patient during trailside repairs is essential. I learned early to keep my most-used tools on top of my pack, not stuffed underneath layers of gear.
Extra Items to Consider (If Space Allows)
- Spare Brake Pads: Key if you ride in a lot of mud or wet, gritty trails—pads can wear down quickly in those environments.
- Chain Lube: A mini bottle of chain lube keeps shifting smooth and quiet, which really matters after rain or stream crossings.
- Pocket Knife: Super handy for slicing zip ties, cutting tape, or unexpected jobs. A small, foldable style works best.
- Spare Bolts and Cleats: Extra bolts for bottle cages or pedals are tiny but can prevent disaster. I tape mine inside my pack so they don’t come loose.
Simple Maintenance to Prevent Trailside Problems
The easiest emergency is the one you avoid with some basic checks. Giving your bike a once-over before each ride—checking tires, testing brakes, spinning wheels, listening for rattling—catches most problems before you even leave home. I lube my chain and top off tire pressure weekly, which reduces mid-ride problems.
Practicing repairs at home, like fixing a flat or installing a new chain link, makes trailside fixes much less intimidating. There are lots of videos online, and joining a local bike skills class can help you feel ready for whatever the trails throw at you.
Questions I Had (And the Answers I Found)
If you’re new to mountain biking, you probably have a few questions about gear and repairs. Here are things I wondered and what I’ve picked up since starting out:
How much should I carry on short rides versus longer trips?
My answer: If I’m riding local trails near home, I stick to basics like a multitool, tube, patches, tire levers, pump, and quick link. On bigger adventures, I bring brake pads, a hanger, and extra snacks, just in case.
Can I count just on CO2 inflators?
My answer: CO2 inflators are convenient and fast, but I always take a mini pump too. If I get multiple flats, it’s good to have backup since CO2 canisters are single-use.
What if I run tubeless tires?
My answer: Tubeless setups handle small punctures well on most rides, but bigger holes need plugs or sometimes a spare tube. I carry a plug kit and a backup tube, just in case.
Wrapping Up: Stay Ready, Stay Riding
Packing a solid trail repair kit helps me relax and focus on having fun, not worrying about breakdowns. Over time, I’ve swapped gear in or out based on the rides I do. The most important thing is knowing how to use your tools—practice at home, ask friends for tips, and get hands-on with repairs. Now, when something happens on the trail, it’s just another part of the adventure rather than the end of the day.
No kit is one-size-fits-all, but finding your perfect mix and updating it as you go will make every ride safer and more enjoyable. Happy riding, and here’s hoping your repairs are fast and few—and you stay rolling as long as you want.