Tire problems are just part of owning a bike, and sooner or later, I always find myself dealing with a flat tire. Thanks to a few good tips and having the right gear, I can often get rolling again in just a few minutes. If you’re new to fixing bike flats or just want to sharpen your skills, I’ll walk through what you need to know to get back on the road quickly.
Why Bike Flats Happen and What You Can Do
I get flats for a bunch of reasons, including riding over sharp objects, hitting potholes, or just from general wear and tear. Most flats happen from punctures. Small holes that tubes or tubeless setups can’t seal right away are the top culprits. Fixing these problems quickly is really important if I want to keep enjoying my ride.
Careful observation helps a lot. When I hear a hissing, or notice pedaling feels squishy and unstable, I know to pull over and check my tire before it causes damage to my rim or makes the bike unsafe. The good news is, with some basic prepping, these situations don’t have to end my ride. Paying attention to how your bike is handling and being alert for unusual sounds can save you from bigger headaches down the road.
The Tools You Need to Fix a Flat Fast
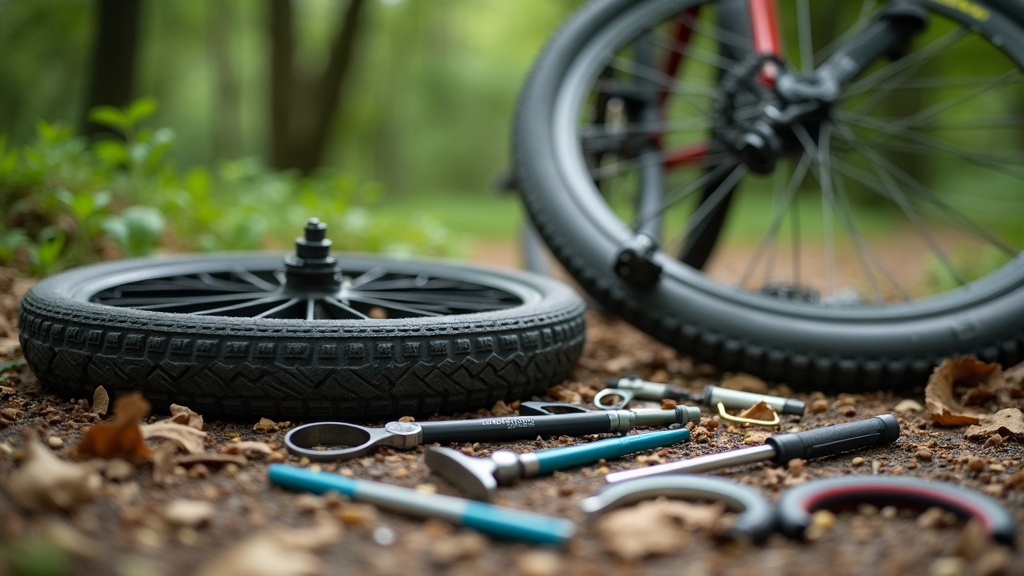
With just a couple of simple tools, I’m set up for an easy fix. Here’s what I always carry in my saddle bag or backpack:
- Spare tube or patch kit: A fresh tube is the fastest fix, while a patch kit takes a little more time but is super lightweight and can save the day.
- Tire levers: These help me get the tire off the rim without pinching my fingers or damaging the tire.
- Mini pump or CO2 inflator: A mini pump takes more effort but never runs out of air. A CO2 inflator makes the job even faster, though I always bring a spare cartridge just in case.
- Multitool (optional): Useful for bike adjustments on multi geared or disc brake bikes.
This small kit adds almost no weight, and it has saved me and fellow riders more than once. Having everything ready before a ride takes away a lot of hassle when a flat does happen. I recommend organizing these essentials in a small saddle pouch to keep your pack tidy and ensure you don’t forget anything.
Step-by-Step Guide: Changing a Flat Tire in Minutes
With practice, I can usually swap out a flat tube in under ten minutes. Here’s the process I follow every time:
- Shift to the smallest gear if it’s the rear tire, making it simpler to remove the wheel.
- Open the brake if needed so the wheel clears the brake pads easily.
- Remove the wheel from the bike. Most bikes have quick-release levers or thru axles. I use my multitool if my wheel uses bolts.
- Pry one side of the tire off the rim using tire levers. I work my way around the wheel, slipping the tube out.
- Find the cause of the flat. I check both the outside and inside of the tire. Sharp objects can get stuck and cause another flat right away if not removed. Sometimes, it’s a tiny thorn or shard of glass that’s hard to spot; running a finger slowly inside the tire can help locate the offender, but be careful not to injure yourself on sharp points.
- Insert a new tube or patch the old one. I inflate it slightly so it holds its shape, which helps avoid pinching it between the rim and the tire.
- Work the tire back on the rim. I use my thumbs to push the bead in, making sure not to pinch the tube. Some tires are easier than others, especially after a few rides when the rubber has softened up a bit.
- Inflate the tire fully with a mini pump or CO2 inflator. I check the pressure by feel or with a gauge, aiming for the recommended PSI printed on the sidewall.
- Reinstall the wheel and spin it to make sure it sits straight and nothing rubs. Double-check that your chain is on correctly if you removed the rear wheel.
- Stow any tools and test the brakes before heading out.
The first few times fixing a flat can take a little longer, but after a bit of hands-on practice, the steps become second nature. If you’re feeling unsure, watching a quick online video or practicing at home will give you confidence heading into your next ride.
Common Challenges and How to Overcome Them
Sometimes, fixing a flat is not just about following steps. I run into issues like stubborn tires, tricky punctures, or awkward spots where stopping is tough. Here are some common problems and how I manage them:
- Tight tire beads: This is really common with new tires or rims. I work slowly, use both tire levers, and finish at the valve to make it easier. Slightly inflating the tube before placing the tire back on can help settle it in place.
- Punctures you can’t find: If the hole is tiny, I pump a little air into the tube and listen or feel for escaping air. If nothing shows up, a water bottle or puddle can help me spot bubbles, revealing the leak’s location.
- Multiple punctures: Riding over sharp debris can make more than one hole. Patching several times might work, but replacing the tube is faster, especially if you’re short on time or patch material.
- Patch won’t stick: I always clean the tube and rough up the surface with the included sandpaper before applying the patch. Then I wait a minute for the glue to get tacky, which makes for a stronger bond in the long run.
I also try not to rush. Taking a little extra time to double-check everything prevents a repeat flat a few minutes later. When I’m with a group, I let someone know if I need help or more light, especially during evening rides.
What to Think About Before a Ride
A bit of preparation makes fixing a flat much smoother when it happens. Here’s what I do before heading out:
- Check tire pressure. Proper PSI helps prevent pinch flats and makes for a smoother ride.
- Inspect for visible cuts, thorns, or bulges. These are warning signs that a tire or tube might need early attention.
- Bring a repair kit, spare tube, and pump on every ride. Even a short neighborhood trip can go wrong.
- Know your route. If I’m far from help, a little extra caution, or even carrying a second spare tube, can be a big deal. Use your phone to snapshot your intended path.
I’ve found that just a minute or two of inspection avoids a lot of hassle. Add this routine to your pre-ride checklist so you’re never caught off guard. If you’re riding with friends, checking on their repair kits can be helpful for everyone involved.
Tubeless vs. Tube Tires: Which Is Easier to Fix?
Many newer bikes use tubeless tires, which are great for preventing many minor flats since sealant inside fills tiny holes. When I do get a bigger puncture, here’s how I handle it:
- Small holes often seal on their own if I spin the wheel to distribute the sealant.
- For bigger cuts, I use a tubeless plug kit. I follow the same approach as with a car tire plug: insert, twist, pull out, and trim the extra. Getting familiar with the tubeless repair kit’s key pieces before your ride pays off.
- If things really go wrong, I pop in a spare tube and ride home like I would on a standard tire. Having a tube as a backup is always smart, even with a tubeless system.
Tubeless systems can seem more complicated at first, but after a few repairs, I find the benefits really pay off in fewer flats overall. Regularly topping off sealant helps too. Don’t forget, swapping to tubeless can make your rides more comfortable by riding at lower pressures without pinching the tube (because there isn’t one).
Extra Tips for Fast and Safe Fixes
Fixing a flat in the field is easier when I keep these small habits in mind:
- Practice tire changes at home when I’m not rushed, so I know how everything works. This dry run takes less than fifteen minutes and boosts your confidence.
- Store tools and spares in the same place every ride for easier access. A well-stocked and organized repair kit saves time in a pinch.
- Carry disposable gloves or a small rag to avoid greasy hands. It keeps both you and your bike cleaner, which is always a bonus, especially for road cyclists.
- Share a tube or patch kit with a riding buddy if they’re unprepared. It’s a great way to make friends and keep group rides going, fostering a helpful biking community.
These tips have made my rides way more enjoyable because I worry less about mishaps. Building a habit of regular checks and organized gear pays off long-term for any cyclist.
Frequently Asked Questions
I get a lot of questions from riders new to flat repair. Here are some answers you might find helpful:
How can I avoid flat tires altogether?
Running puncture resistant tires and thicker tubes helps a lot, and I try to avoid riding through debris. Keeping tire pressure at the right level also makes a difference. Sometimes, slightly reducing pressure on rough trails prevents pinch flats, but be careful not to go too low.
Is it okay to patch tubes more than once?
I usually patch up to two or three holes on a tube if the repairs hold. Over time, I replace the tube when patches start to peel or the rubber gets thin. Keeping an eye out for repeated flats in the same tube is important for long term reliability.
How do I fix a flat in the rain?
Repairs in wet weather are trickier, but if I dry the area on the tube as well as I can before patching, the patch sticks better. Sometimes, just popping in a spare tube is faster in these conditions. Also, standing away from puddles or finding a dry patch of ground helps ensure successful repairs.
Do tire liners or sealants really help?
Yes, they add an extra layer of protection. Tire liners sit between the tire and tube to block sharp debris, while sealants plug small punctures as they happen, especially in tubeless setups. Both help minimize trouble on longer adventures.
Ride Worry-Free with Basic Repair Know-How
Knowing how to fix a bike flat can make a big difference in how much I enjoy cycling. With a repair kit, some practice, and a little patience, I get back on the road quickly and don’t miss out on my ride. A flat tire is sometimes just a pause, not an ending.
Giving this routine a try on your next ride keeps plans on track, even when unpredictability strikes. Happy riding! Remember—practice and preparation are your best friends when it comes to beating that inevitable flat.