If your bike brakes aren’t working the way you expect, it can turn a calm ride into a nerve-wracking experience. I’ve run into this myself, so I know how frustrating and even risky this issue can be. Understanding why bike brakes lose their stopping power takes a closer look at several key parts and conditions. Here, I’m sharing what I’ve learned about common reasons for poor brake performance, and how you can get your bike braking smoothly and confidently again.
Common Reasons Your Bike Brakes Feel Weak
I’ve found various causes behind weak bike brakes. Knowing where to check first can help you solve the problem faster and get back out on the road with better control.
Some of the most frequent reasons include:
- Worn Brake Pads: Pads that are too thin or uneven don’t grip the rim or rotor as they should, making it hard to slow down quickly.
- Dirty or Contaminated Braking Surfaces: Dirt, oil, or grime can get stuck on the rims, rotors, or pads, stopping them from making solid contact.
- Loose or Stretched Cables: For mechanical brakes, old cables can stretch out or work loose, so the force of pulling the lever doesn’t transfer well to the braking surface.
- Poorly Adjusted Brakes: Brakes out of alignment might rub, feel squishy, or miss the rim or rotor partially, giving less stopping power and more annoying noises.
- Hydraulic Brake Issues: If you use hydraulic brakes, air bubbles in the system or leaks in the lines can lead to less braking force and a spongy feel.
Learning the Basics About Your Bike’s Brakes
Knowing a bit about how your brakes work makes it much easier to spot trouble. Most bikes use either rim brakes or disc brakes.
- Rim Brakes: These brakes squeeze two pads against the wheel rim. They’re often found on road bikes and more budget-friendly mountain bikes.
- Disc Brakes: These clamp pads onto a round rotor attached to the wheel hub. Disc brakes come in both mechanical (cable actuated) and hydraulic versions. They’re popular on modern mountain and gravel bikes and many new road bikes.
Each type has its own pros and cons, but all will struggle if key parts are worn out, dirty, or misadjusted.
What to Check First: Quick Inspection Steps
If my brakes feel off, I do a fast check using these steps. A simple look can help spot obvious problems. Here’s what I usually do:
- Squeeze both brake levers and watch for any delay, squishiness, or if a lever pulls almost to the handlebar before the brake grabs.
- Check that no cables are frayed or have loose bolts.
- Take a close look at the thickest part of each brake pad or the surface that touches the rim or rotor. If it’s very thin, think less than the width of two credit cards put together, it probably needs a replacement.
- Spin each wheel and watch for rubbing sounds or spots where the rim or rotor isn’t running straight.
Troubleshooting this way helps narrow down if the issue is mechanical, alignment, or with the pads themselves.
How Dirty Parts Make Brakes Worse
Even the best brakes won’t work well if something is dirty or greasy. I remember cleaning my bike after a day on muddy trails and instantly noticing a big improvement. Here’s why keeping things clean really matters:
- Brake Pads: Pads collect tiny particles and oils from the road, which can glaze over and slip on wet or dry surfaces.
- Rims and Rotors: Dust, oil from greasy fingers, or spray from bike lube and cleaning products can build up and act like a barrier instead of helping the brake grab effectively.
Wiping pads, rims, and rotors with rubbing alcohol and a lint-free cloth gives a noticeable difference. Avoid household detergents, or anything that leaves a residue.
It’s also smart to check after especially dirty or wet rides. For city cyclists who encounter grit and debris, I advise giving your rims and brake pads a once-over once a week. If you ride off-road or in muddy conditions, a quick wipe after every ride really helps maintain solid braking performance.
Addressing Cable Slack or Hydraulic Issues
I’ve seen both old cables and hydraulic brakes cause headaches. Here’s what can go wrong and what to do:
- Cable Brakes: As cables stretch out over time, you’ll notice more lever movement with less stopping force. Sometimes, a bit of tightening at the barrel adjuster or anchor bolt brings things back to normal. If the cable has frayed wires or rust, I replace it completely.
- Hydraulic Brakes: Spongy or inconsistent brakes can mean air is trapped in the lines or there’s a leak. Bleeding the brakes (removing air and refreshing the fluid) restores stopping strength. If you’re not experienced with this, a local bike shop can help.
Make sure to examine both the levers and the calipers when checking for leaks. If the lever feels mushy or the brakes lose firmness after a few pulls, this is usually a sign air or moisture has made its way in, so a proper bleed is needed to fix it.
Signs You Need New Brake Pads
Brake pads are small, but their role is huge. In my experience, swapping them out at the right time gives more stopping force immediately, especially if your current ones are old and uneven. Here are signs I watch for:
- Pads look glassy or shiny, which means glazing and lost grip.
- Squealing or scraping noises even after cleaning the pads and rotors or rims.
- Less thickness than about 3 millimeters (or less than the thickness of two stacked credit cards).
- Visible grooves that are completely worn away.
On many disc brakes, you can look right down the caliper with a flashlight to see how worn the pads are. For rim brakes, pads usually have small lines or grooves; if they’re gone, replace the pads. Also pay attention to how the pads are wearing. If one side wears faster than the other, the caliper may need repositioning or there could be alignment issues elsewhere.
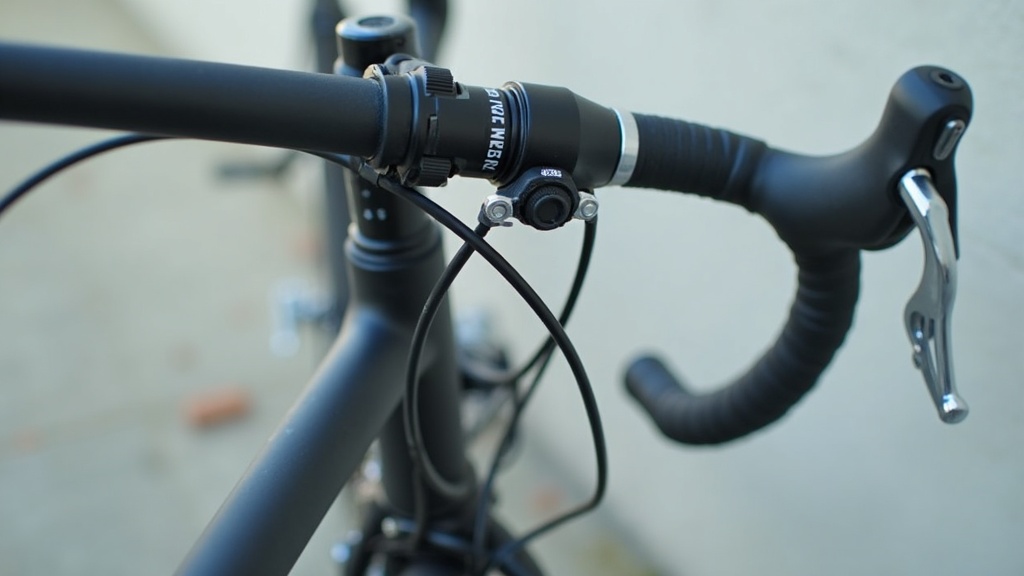
Common Brake Adjustments to Try at Home
Many fixes don’t take special tools. Here are steps I use regularly:
- For Rim Brakes: I center the pads so they hit the rim flat and at the same time. I make sure the pads don’t rub the tire or hang below the rim. A 5mm Allen wrench or small Phillips screwdriver often does the trick.
- For Disc Brakes: I loosen the caliper bolts, squeeze the brake lever to center the caliper, then tighten the bolts evenly. This seats the caliper and pads over the rotor, often fixing rubbing and adding more power.
- Cable Tension: Adjust barrel adjusters to take up slack if the lever comes too close to the handlebar before engaging.
If those steps don’t help, the problem may be more serious, like a bent rotor or rim. In that case, I often roll by my local bike shop for a hands-on fix.
If you’re someone who rides in varying conditions, carrying a small multi-tool with an Allen wrench, screwdriver, and a spare pad or two is a big help. It’ll let you make on-the-spot adjustments to keep your brakes working their best, especially on longer rides or remote trails.
Outside Influences: How Weather and Riding Style Matter
Sometimes the issue isn’t the bike, but where and how I ride. Wet weather or long, rough descents can cut down on braking power, especially for rim brake users. Water acts as a film between brake pads and the rim or rotor, making it harder to stop. Mud or road grit can also act like sandpaper, wearing down pads faster.
If you ride in rainy areas, consider using brake pads made for wet conditions and check them more often for wear. Keeping braking surfaces clean after every ride in these situations helps the most. Also, brake a bit earlier in the wet than you might on dry days to account for a slower response.
Take note of how your riding style affects brake life. Aggressive descents, heavy loads, or constant stop-and-go city rides wear down pads and cables faster than casual rolling along quiet roads. City commuters should check brakes more often, while mountain bikers need to keep an eye on both pads and rotors. This habit can help avoid unexpected surprises mid-ride.
Bike Upgrades That Can Help with Braking
If you still struggle with braking after regular tweaks, you might consider simple upgrades. Here’s what I recommend from personal experience:
- Upgrading to premium pads; many brands make higher friction compounds designed for your climate and riding terrain.
- Switching to larger rotors if you have disc brakes, which spreads braking force and helps with cooling on long descents.
- Using compression less cable housing for mechanical brakes, which transmits more force from the lever to the pads.
For some, converting from rim to disc brakes could be a bigger fix, but it’s not always needed unless you’re making big leaps in terrain or technique. Also, for those who commute in bad weather year-round, consider investing in sealed cable systems to ward off grime and rust. This small switch can keep your braking system working better, longer.
Frequently Asked Questions
Many questions come up about brakes. Here are a few common ones I hear often:
Why are my brakes squealing so loudly?
Often, this means pads or braking surfaces are dirty or glazed. Cleaning everything with isopropyl alcohol helps. If that doesn’t stop the noise, replace the pads.
How often should I change my brake pads?
This depends on how you ride, but I usually swap pads when they reach about 2-3 millimeters thick, or yearly for moderate riding. More frequent checks are needed if you ride in wet or dirty conditions.
Is it normal if my brake lever feels spongy?
No, a spongy lever usually means air in the hydraulic line or extra slack in the cable for mechanical brakes. Bleeding hydraulic brakes or tuning cable tension should sort it out.
Should I fix my brakes myself, or go to a shop?
Many adjustments and pad changes can be handled at home with simple tools. If you see fluid leaking from hydraulic brakes, or if you’re unsure, a professional mechanic can check things safely and quickly.
Getting Confident Brakes Again
I know from experience that good brakes make riding feel a lot more comfortable. Basic checks, regular cleaning, and small adjustments make a real difference. If any step feels intimidating, local shops are a great resource for advice and repairs. Focusing on brake safety keeps every ride smooth and trouble-free, so you can enjoy your time on two wheels without worry. Remember, confident stopping isn’t just about comfort—it’s a key to riding safely, wherever your adventure takes you.